

Rawlplug Vinylester Styrene-Free Resin 400ml (RAW R-KER-II-400)
High performance vinylester resin approved for use in cracked and non-cracked concrete
Variant price modifier:
Base price with tax
WasR366.99
Discount
Tax amount
Price includes VAT
.jpg)
Click on picture for a larger view.

Just R37 per month on 
Estimated Dispatch Time:
Click here to find out More
Click here to find out More
Would like to ask a question, please login.
Recommend this product to a friend
Description
Rawplug Vinylester Styrene-Free Resin 400ml (RAW R-KER-II-400)
Specifications:
- Approved for use in cracked and non-cracked concrete
- Suitable for use in wide range of temperatures (application from -5oC up to +40oC, exploitation from -40oC up to +120oC
- Excellent chemical resistance (durable for alkaline and sulphurous conditions)
- Suitable for multiple use. Partly used cartridge can continue to be used after fitting new nozzle
- C1 approval for seismic application
- Suitable for use in dry and wet substrates as well as holes and substrates covered with water (approved for application in flooded sea water)
- New installation procedure (compressed air cleaning)
- Electric resistivity
Applications
- Pipes/ Installations
- Facades - Large Panel Reinforcement System
- Balustrading
- Barriers
- Curtain Walling
- Fencing / Gates
- Shutters
- Conduits
- Cable Trays
- Seismic strenghtening
- Large panel reinforcing system - Copy Eco
Base materials
Approved use in:
- Cracked concrete C20/25-C50/60
- Non-cracked concrete C20/25-C50/60
Installation guide
 |
 |
 |
 |
 |
 |
 |
 |
 |
|
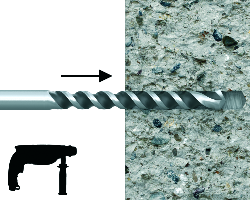
- Drill hole to the required diameter and depth for stud size being used.
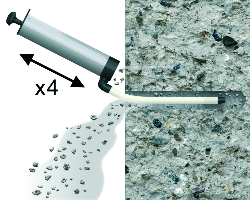
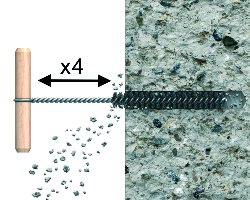
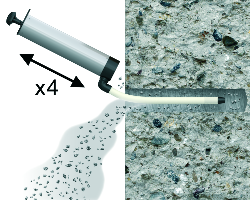
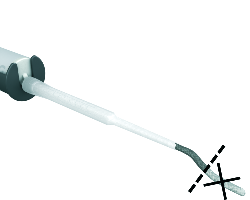
- Clean the hole with brush and hand pump at least four times each. It is very important and necessary before installation.
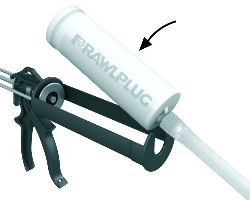
- Insert cartridge into gun and attach nozzle.
- Dispense to waste until even colour is obtained.
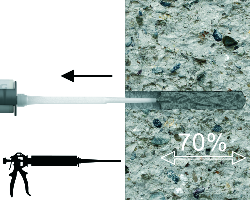
- Insert the mixing nozzle to the far end of the hole and inject resin, slowly withdrawing the nozzle as the hole is filled to 2/3 of its depth.
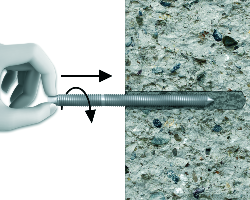
- Immediately insert the stud, slowly and with slight twisting motion. Remove any excess resin around the hole before it sets and leave it undisturbed until the curing time elapses.
- Attach fixture and tighten the nut to the required torque.
Please Login to Write a Review
There are yet no reviews for this product.
Please make sure you are Logged in to write a review.

